
YES, YOU CAN KNIT.
PURL STITCH
There is one more basic stitch that will be very useful: purl.
It’s abbreviated ‘p’ in patterns.
What it means is that you knit the stitches backwards. That sounds worse than it is, and all will be explained below.
If you look at your piece created in garter stitch, you can see the loops created by knitting are on both sides of the work. That is the garter stitch.
If you combine knitting with purling, you get the stocking or stockinette stitch.
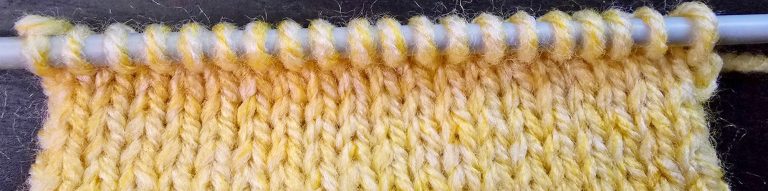
This is where the terms ‘right side’ and ‘wrong side’ come into play. As expected, abbreviated as ‘rs’ and ‘ws’ respectively in patterns, these terms indicate either the front or the back of the work.
The side with all the loops is the ‘wrong’ side, or the back of the finished piece.
The neater looking side, with all the small ‘v’ shapes, is the ‘right’ side or front of the finished piece.
Because the difference is so clear with stockinette stitch, it isn’t very important at this point in your knitting journey. However, once patterns become more complicated it will be good to know how to recognise or keep track of what is the right side and what is the wrong. It is best to get used to this now.
You don’t use ‘front’ and ‘back’ in this respect, because those terms are used to identify what side you are working on. If you read on, you will see these terms in action.
Right side, wrong side
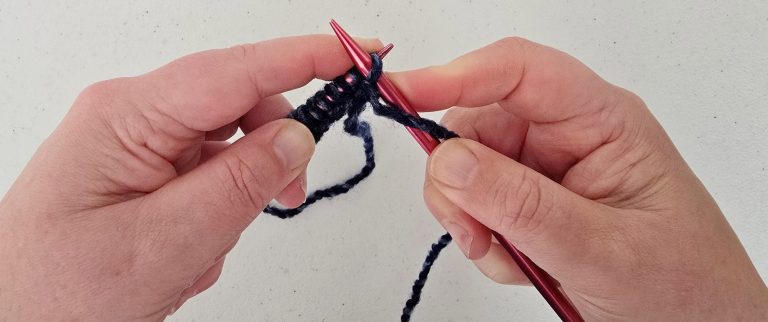
The first thing you should know is that for purling the yarn has to be at the front of the work. The front is the side facing you.
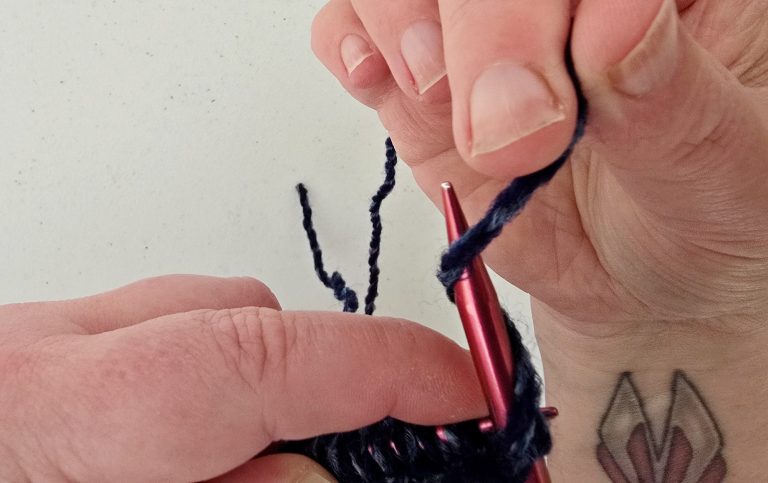
Step 2
Wrap the yarn over the right needle, as follows.
Because it is at the front of the work, you wrap the yarn differently than if you were knitting.
Take the yarn and wrap it over the right needle, left to right. Then wrap it under the needle, as pictured.
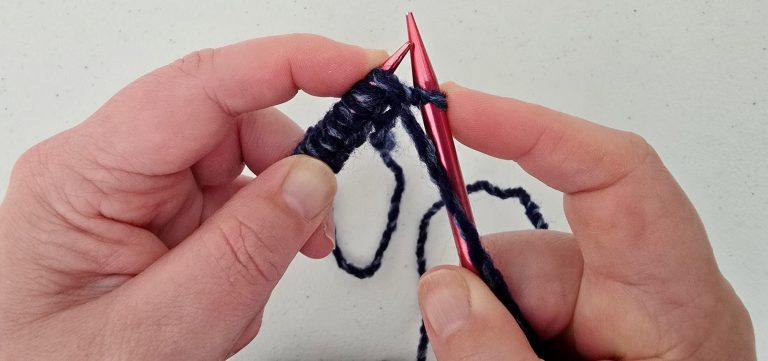
Step 3
Pull the yarn through the stitch.
Step 4
Slide the stitch off the left needle.
You now have one new stitch on the right needle and the remaining stitches on the left.
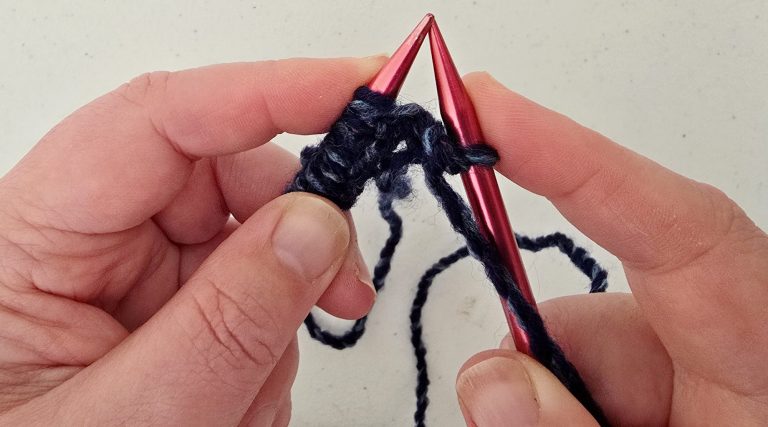
Step 1
Put the right needle through the first stitch on the left needle, against the direction of the left needle, as pictured. This is known as ‘purlwise’.
How to purl
Basically, with stockinette stitch, you make sure the stitches are taken off the needle in the same direction.
Normally, you would knit the uneven rows and purl the even ones. The steps above did not take this into account, because you are trying to learn to purl. If you would purl every row, you basically get garter stitch again!
To practice stockinette stitch: cast on a number of stitches (30 should do), knit the first row, purl the second row. Alternate knit rows and purl rows until you have the number of rows you want. Bind off.
NOTE: stockinette stitch has a habit of curling up. This is normal. This is why you often see pieces that use stockinette stitch with a border, which helps keep the work straight. Or, after you have finished, you can block the piece. In a later article I will explain what that is and how you can do it.
Stockinette stitch explained
You now really have the skills to knit an awful lot of things.
You can use stockinette stitch for the same items as garter stitch, such as pot holders, coasters, placemats, small blankets (and I do mean small, remember?).
However, you are now also ready to knit any of the Yes, You Can Knit patterns, difficulty 1. All these patterns are designed with only knit and purl stitches, so these projects are absolutely achievable.
As always, if you need help, email me at help@voidcatdesigns.co.uk or drop a post in the Facebook group.
Happy knitting!
More articles to come.
Watch this space!
Conclusion

©Copyright 2025. All rights reserved.
We need your consent to load the translations
We use a third-party service to translate the website content that may collect data about your activity. Please review the details in the privacy policy and accept the service to view the translations.