
YES, YOU CAN KNIT.
CAST ON
Casting on is one of those things knitters cannot do without. You have to start getting stitches on the needles. I will not be showing you all methods of casting on, but rather a few of the most usable ones. If any other cast on methods are required for any of my patterns, I will cover those methods at that time.
One very important thing to keep in mind through this entire process is that there aren’t many wrong ways to any of this. Find what works best for you and stick with it.
I will provide different ways to do things, only to help you find what works for you. You’ve got this!
In this article
If this is the first time you are going to knit, I would advise you to read this entire article. If, however, you want to refresh your memory or need a particular subject, please use the following links to jump to the section you need.
Materials
You will need two single pointed needles and some yarn. I advise to use 4mm needles and DK yarn. Since at this point you are practicing, if you have any scrap yarn, use that.
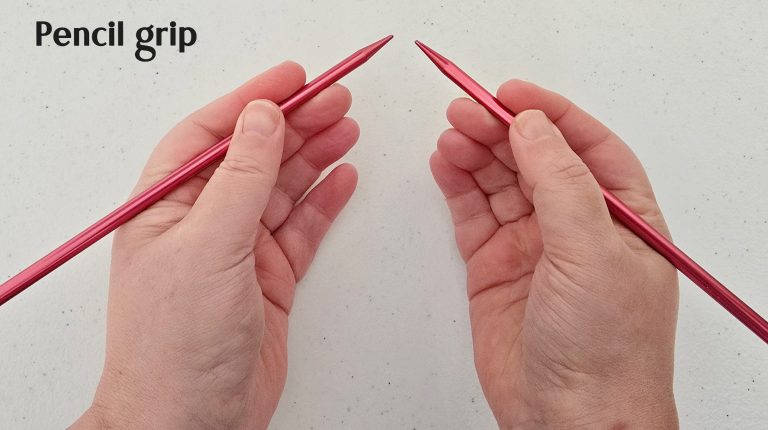
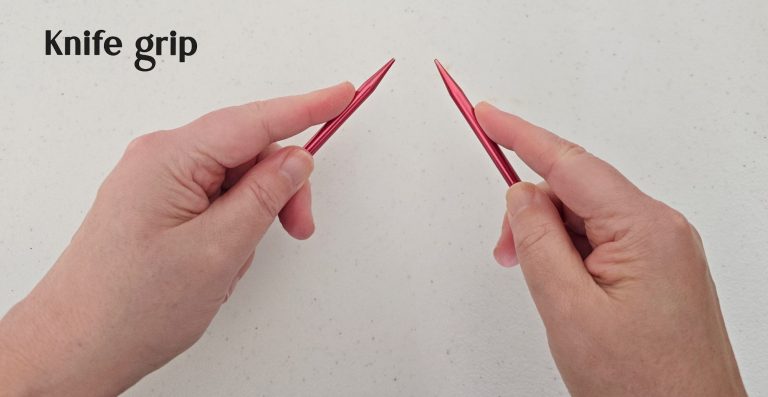
All my instructions and examples will be using the knife grip. To be fair, pencil grip is fairly uncommon, as it is an old-fashioned way to hold needles.
The most common ways to hold the yarn, in the UK at least, are the continental way and the English way.
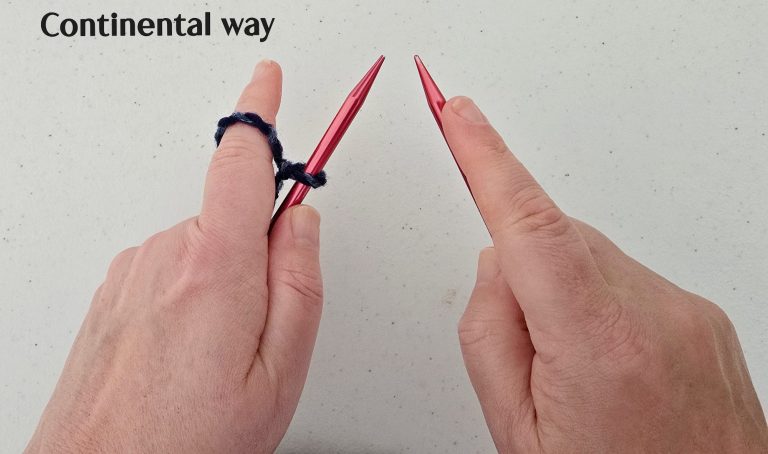
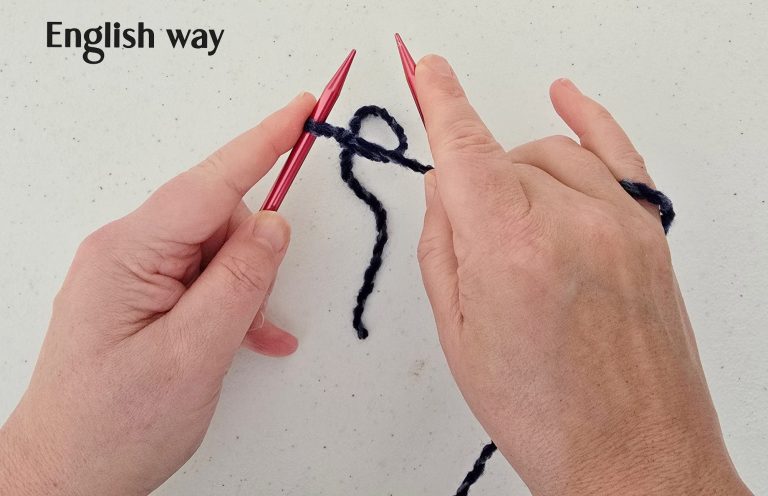
As you can see, the continental ways means holding the yarn in the left hand. The English way means holding the yarn in the right hand.
In my instructions and examples I will use the English way, because that is how I was taught to knit. It is also the way I see most people knit. But, again, if you want to try the continental way, go for it.
Holding the needles and yarn
There are two ways to hold your needles: the pencil grip and the knife grip.
Please keep in mind that initially your work may be too loose, too tight or uneven. That is entirely normal. It takes time to get knitting ‘in your fingers’, before it become muscle memory.
Please don’t be disheartened by this. Persevere. Or, if you need a boost or support, send me a message (email, Facebook or Instagram).
In the beginning focus on having enough space to move the needles in and out of the stitches. It’s fine to start of with stitches that are too large. You can always make them smaller when you have done this a few times.
Before you begin
The beauty of this method of casting on is that you can leave a fairly short tail, because you are using the yarn at the side of the ball of yarn to create additional stitches. One thing to keep in mind is that the tail has to be long enough to be worked away with a sewing needle. About 10 cm is a reasonable length.
TIP: You NEVER knit with the tail.
Step 1
Start the process by creating a slip knot. Place the slip knot on the left needle.
Put the right needle through the stitch (also referred to as ‘loop’) on the left needle. Make sure you follow the direction of the left needle.
Step 2
Now wrap the yarn (the long end, at the side of the ball of yarn) around the right needle. To do this, the yarn has to already be on the right-hand side of the right needle. You will then move the yarn down, then to the left and back to the right OVER the right needle, as pictured.
Step 3
Pull the loop created on the right needle through the stitch. Make sure that first stitch stays on the left needle while doing this.
Step 4
You are now holding two stitches on two needles. To cast on the stitch/loop on the right needle needs to be transferred to the left needle. It is at this point absolutely fine to make the loop on the right longer. It gives you more space to put the left needle through the stitch on the right needle. Again, make sure you follow the direction of the right needle. In short: you put the left needle through the back of the right-hand stitch (closest to your hand), towards the front. Then remove the right needle and tighten the yarn somewhat.
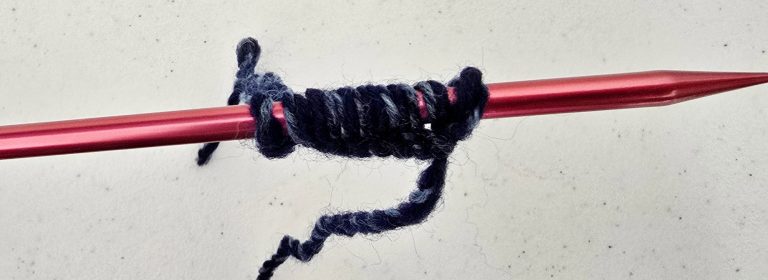
Continue adding stitches in this way until you have several on the left needle.
Casting on - knitting method 1
Knitting method 2 is very like method 1, with one notable exception: you create stitches in between the existing stitches. Let me show you how this is done.
Step 1
Start by creating a slipknot and placing it on the left needle.
The second stitch is created the same way as described in method 1. Here are the steps again:
Put the right needle through the stitch (also referred to as ‘loop’) on the left needle. Make sure you follow the direction of the left needle.
Step 2
Now wrap the yarn around the right needle. To do this, the yarn has to already be on the right-hand side of the right needle. You will then move the yarn down, then to the left and back to the right OVER the right needle, as pictured.
Step 3
Pull the loop created on the right needle through the stitch. Make sure that first stitch stays on the left needle while doing this.
Step 4
You are now holding two stitches on two needles. To cast on the stitch/loop on the right needle needs to be transferred to the left needle. It is at this point absolutely fine to make the loop on the right longer. It gives you more space to put the left needle through the stitch on the right needle. Again, make sure you follow the direction of the right needle. In short: you put the left needle through the back (closest to you) of the stitch, towards the front. Then remove the right needle and tighten the yarn somewhat.

Step 5
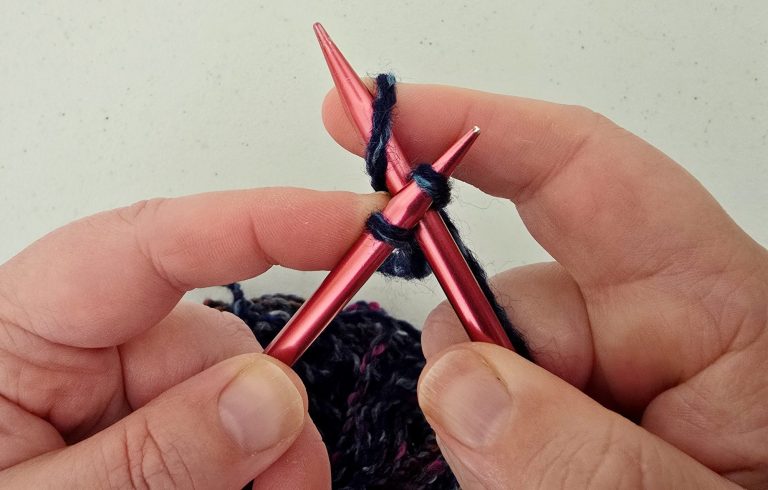
This is where the methods differ.
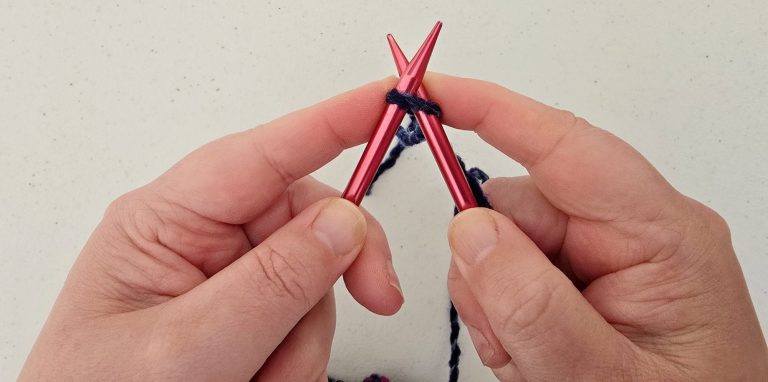
You now place the right needle between the two stitches on the left needle.
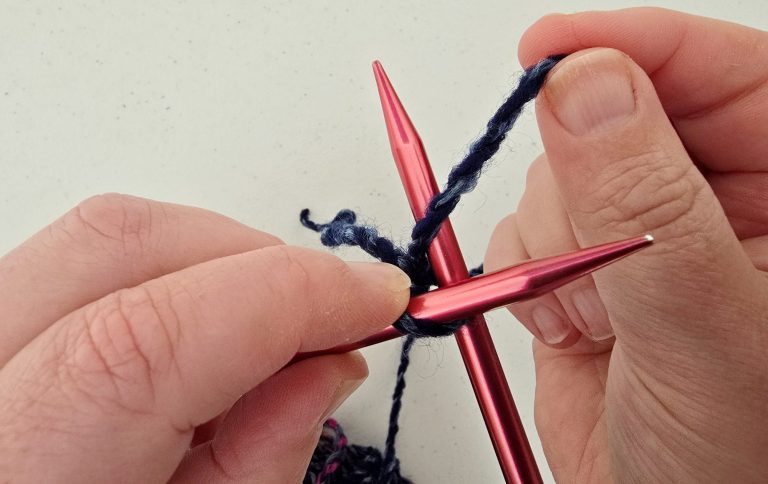
Step 6
Wrap the yarn around the right needle in the same way you did for the previous stitch.
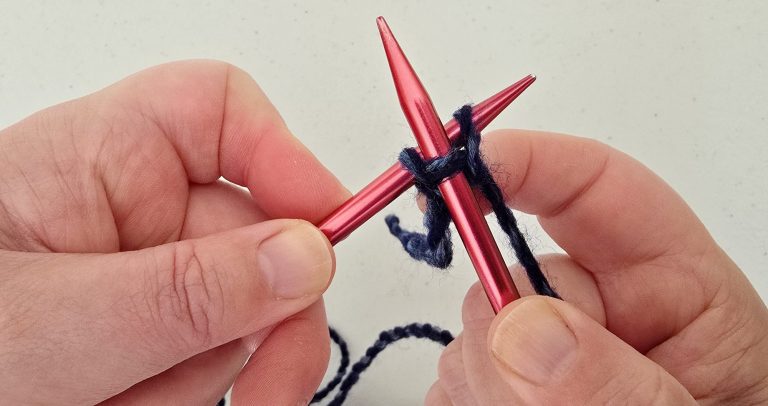
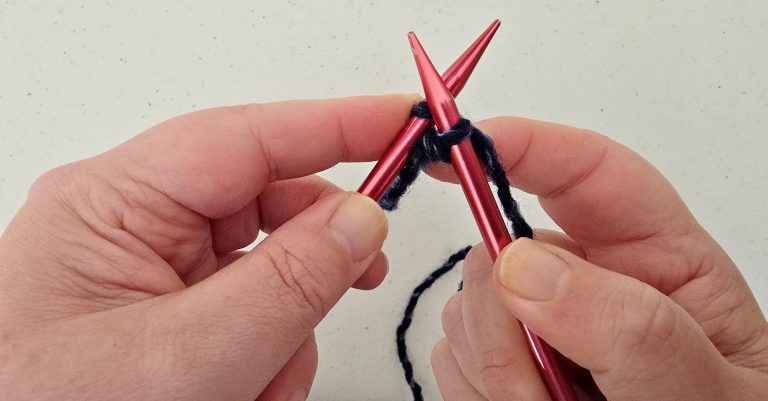
Step 7
Pull the loop created on the right needle through between the first two stitches. This creates a stitch on the right needle.
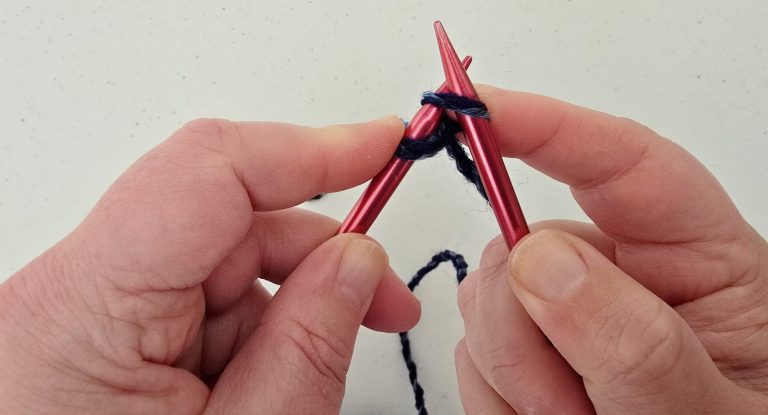
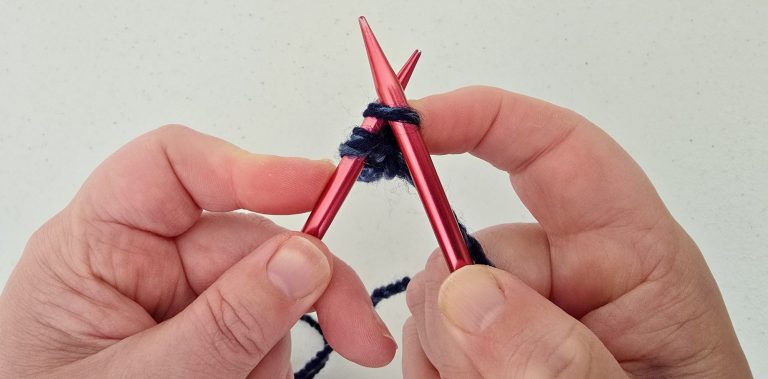
Step 8
Now, place that stitch from the right needle on the left needle. Make sure you follow the direction of the needles.
Repeat steps 5 to 8 until you have several stitches on the left-hand needle.
Casting on - knitting method 2
The reason I started with the two knitting methods is because they are simpler and they provide a beautiful amount of stretch at the bottom of your knitted piece. Another advantage is that you can simply leave a fairly short tail and start knitting.
There is, however, another way to cast on, called the long-tail method. One downside of this method is that you have to guess how much yarn you will need for the number of stitches you want to cast on. And it’s more complicated.
I am still including it here, because it works better for some people. In fact, it was the only casting on method I was taught when I was a mere 8 years old. I didn’t know any other way until a few years ago!
At this point you have a choice: give the long-tail method a try or just go to the next article and start knitting.
This is how the long-tail method is done.
Step 1
Make a guesstimate on how much yarn you will need for, say, 20 stitches. Make a slipknot and place it on the right needle.
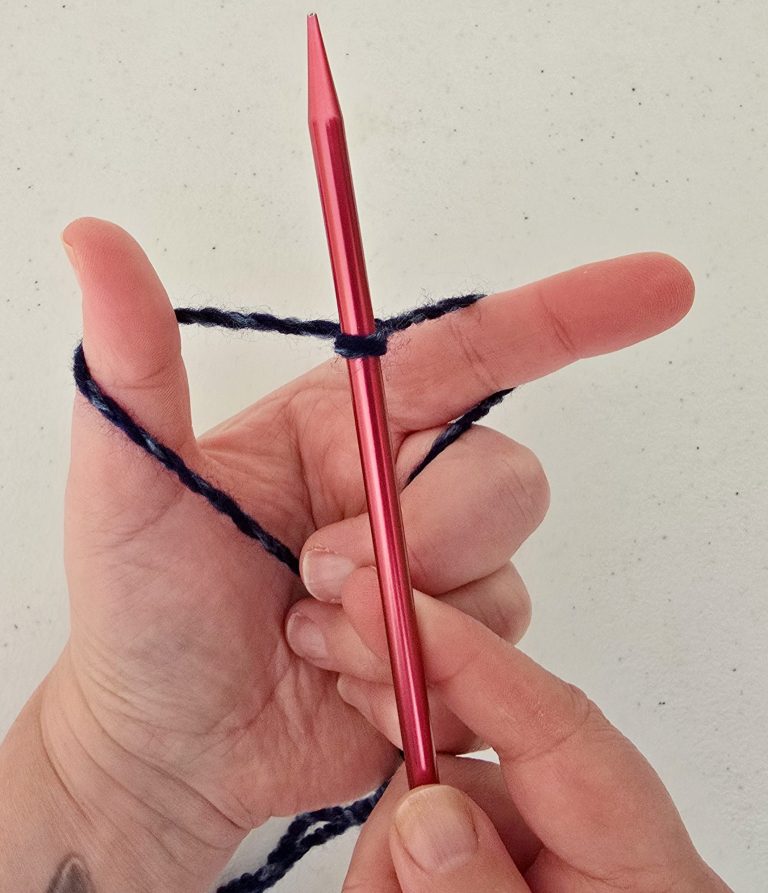
Hold the yarn around your left thumb and left index finger, as pictured.
Keep the tail on the left and the yarn you’ll be knitting with on the right.
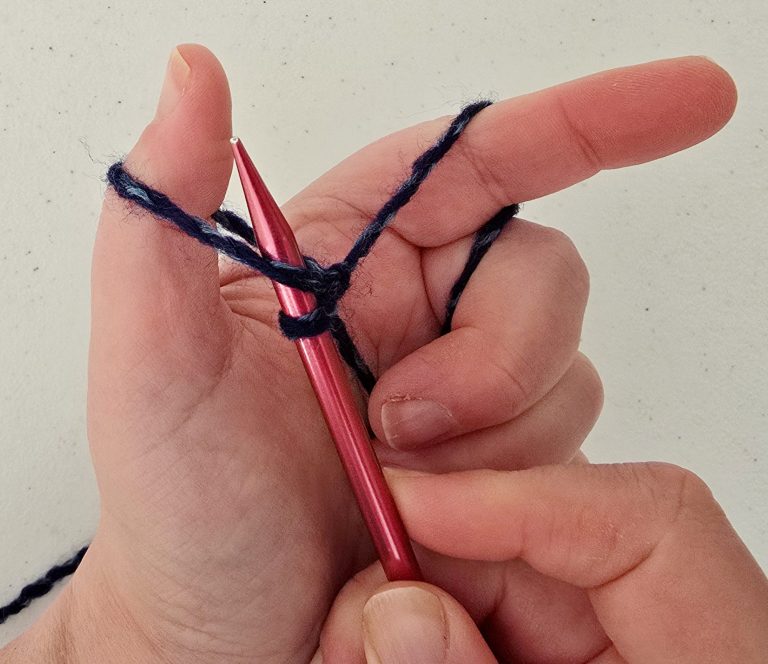
Step 2
Move the right needle towards your thumb. Pick up the yarn from the very left, under the yarn – between yarn and thumb.

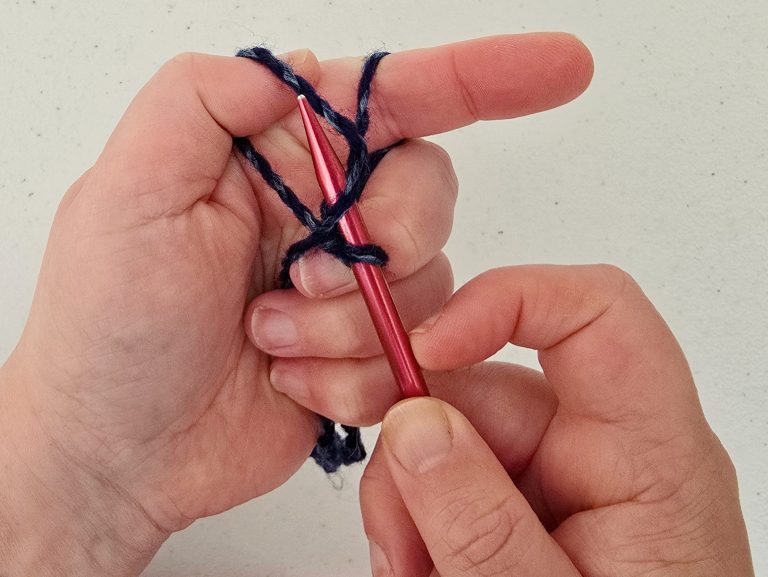
Step 3
Move the right needle over the yarn on the right, between yarn and index finger, from right to left.
Step 4
You now have a loop on the right needle, which you can pull through to create a stitch.
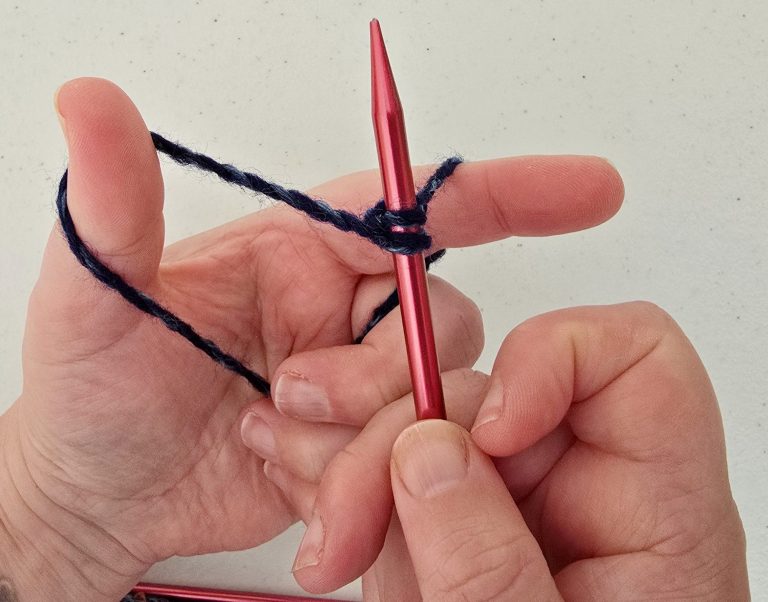
Step 5
Pull both ends of yarn, which you are holding with your left hand, tighter to create a nice loop on the right needle.
Repeat these steps to add more stitches.
As I said before, this is a more complicated way of casting on and it is certainly not for everyone. If you don’t get along with this method, forget about it. Find what works for you.
Casting on - long-tail method
You now have instructions to three ways of casting on, which should be enough to get you started. I suggest you cast on 30 stitches and then continue to the next article. It’s time to learn to knit in earnest.