TOOLS 101
ACCESSORIES
This is a pretty long article. You can of course read it all in one go, if you want, but if you are looking for specific information, just jump to the section you need. Here are the space portals you can use (also known as links).
Surely needles and yarn are all you need to get started? Basically, yes. So if at this point you just want to get going, I am not going to stop you. Get those needles, buy some yarn, make sure you have scissors and have fun.
But, along the way, you will find that some available accessories can make your knitting life so much easier.
In this article
You may be aware that there are many different types of scissors. You may be asking, however, if there are knitting scissors.
Believe it or not, yes, there are.
To be honest, you really do not have to get special scissors to cut the yarn. Just make sure you do not (really, never!) use fabric scissors for this. Fabric scissors are a protected species. Back away.
If you ever use sewing thread to sew together a knitted piece you may want to invest in small scissors (as pictured) or thread snips. They do the same thing, they’re small and can get in the tiniest of places. Can be handy.
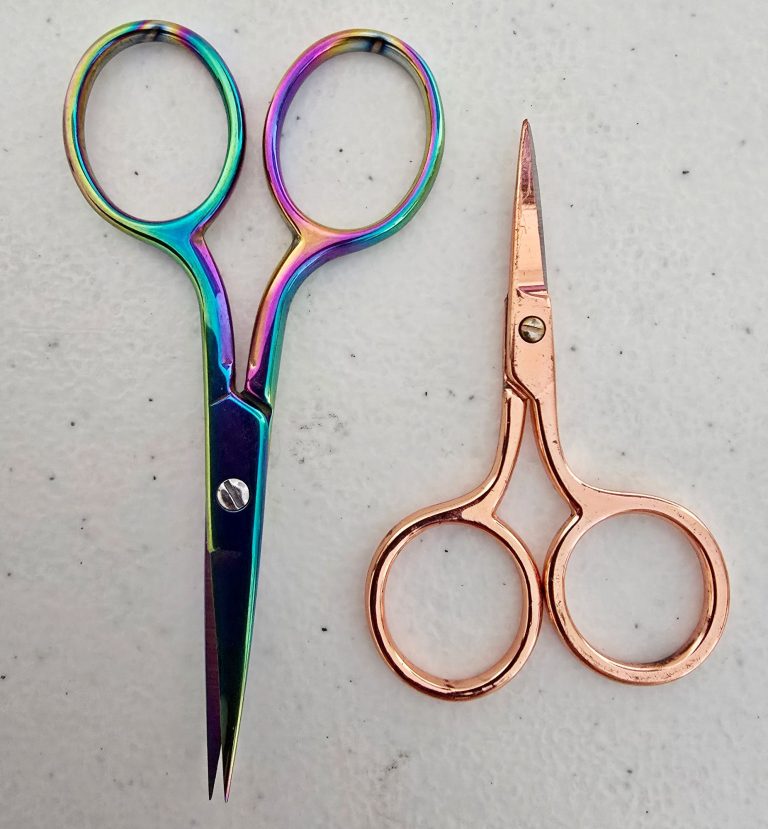
Scissors
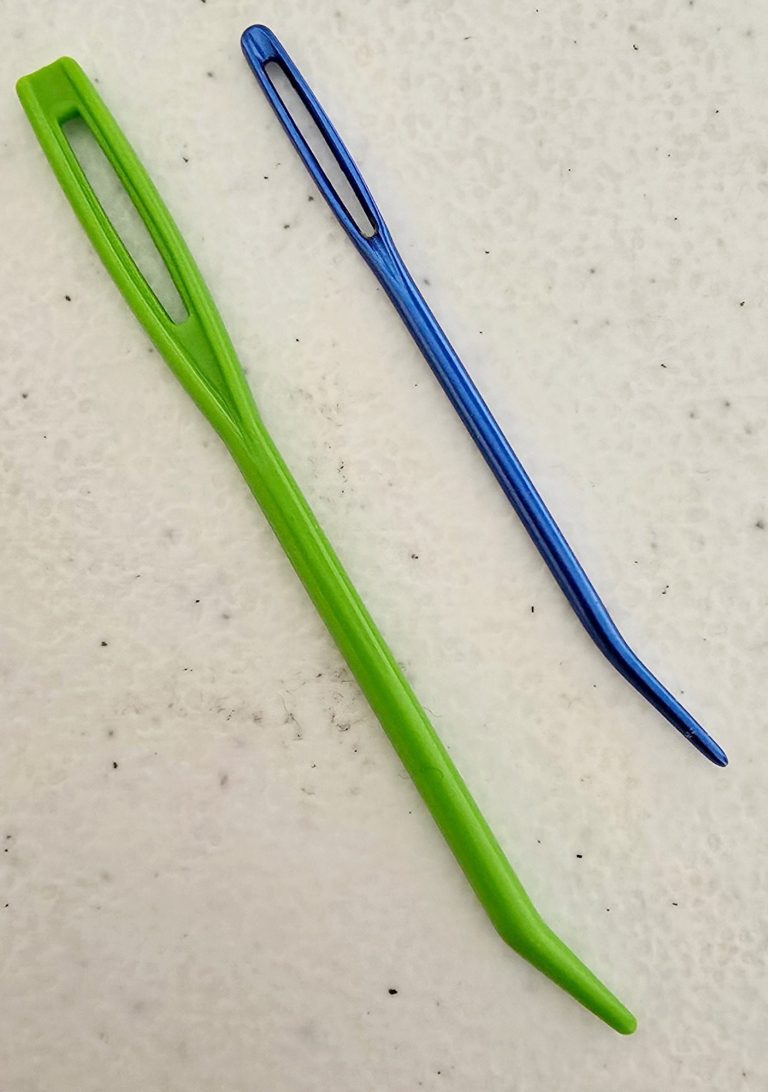
Once you start knitting things in ‘bits’, such as garments, you’ll have to sew them together at the end. The most commonly used needle for this job is a tapestry needle. There are many available in plastic, but I would suggest you get a sturdy metal one. I have found the plastic ones have absolutely humungous eyes and this can cause small holes in your knitted piece. The metal ones are of a better proportion overall and therefore preferred.
You can also use any other larger sewing needle with an eye large enough to accommodate yarn. If you have knitted with very thin yarn, you might be able to use fairly regular, smaller sewing needles. Of course, chunky yarn would require something a bit bigger.
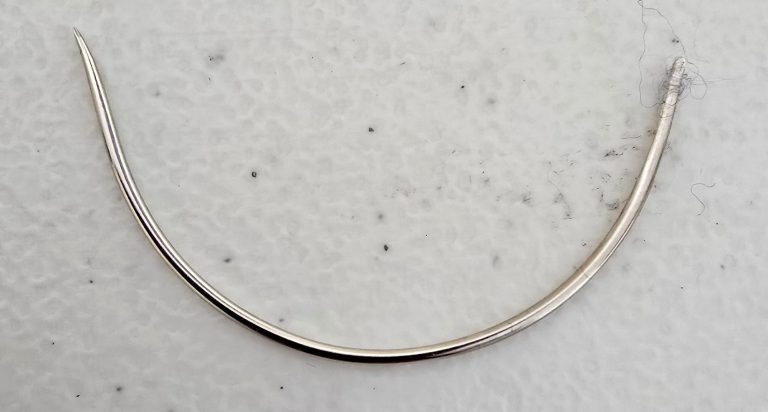
It also depends on what type of stitch you are using to sew the seams. If you use the ladder stitch, you might want to try a curved needle, such as pictured here.
Another option for closing seams is crocheting. The crochet needle needs to be appropriate for the yarn weight, of course. If your work is not reversible, you can definitely consider a crocheted seam.
Needles, not of the knitting kind
You will very likely start out with a small piece of knitting. Or you will want to start with a swatch to check your tension. In these cases you can definitely opt to just write down the number of rows you have knitted.
But what are you going to do once you start knitting larger pieces or lace knitting, where you have to keep up with the rows of the pattern and the entire piece?
This is where counters come to your rescue.
There are several types of counters and ultimately you have to decide which ones work for you. I will show you the ones I use.
Is there anything in the world that doesn’t come in digital form? Probably not much.
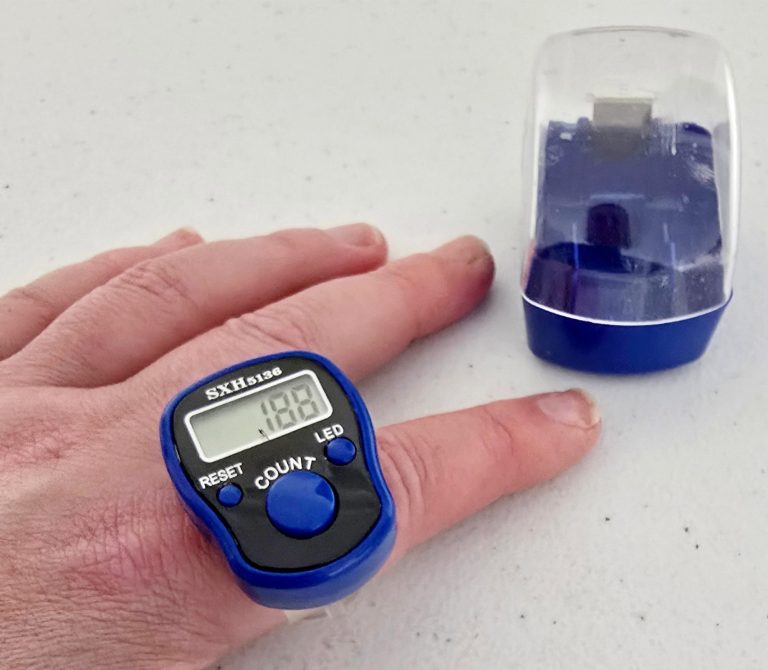
Instead of turning dials, you simply click a button and the counter shows you the number of rows you have completed.
I have the type shown in the image below, which go on my fingers.
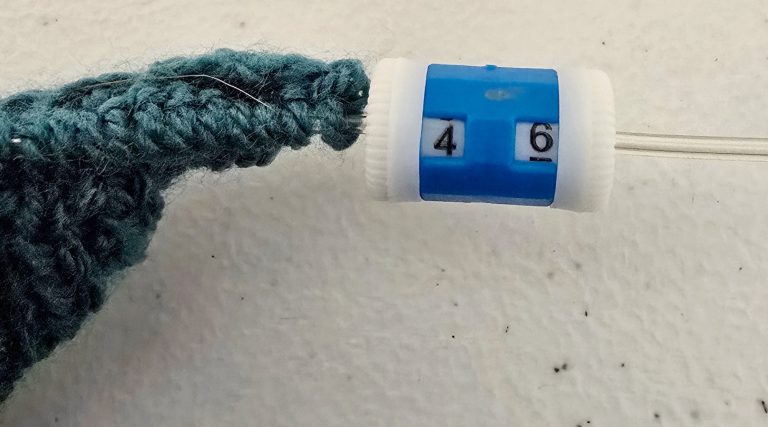
I have several of these little round manual counters. They fit over a few sizes of needles, most notably the 4mm needles. At the end of each finished row, I turn the dial(s) at each end to change the number.
These counters are cheap and easy to find. Make sure you don’t buy too cheap, though, as they may not fit very well over the needle, have dials that are difficult to turn or the numbers aren’t perfectly lined up to the windows on the counter.
I sometimes use two at the same time. Why? Because on one I am counting the total number of rows I’ve knitted and on the other the numbers of the pattern in this piece (which is a 24 row repeat).
You can find digital counters that you can hang around your neck too.
There are probably many more variations, but again, it depends on your preference. It usually works if you start out cheap (manual counters) and work your way up in price, depending on how useful you find them.
Counters
Manual counters
Digital counters
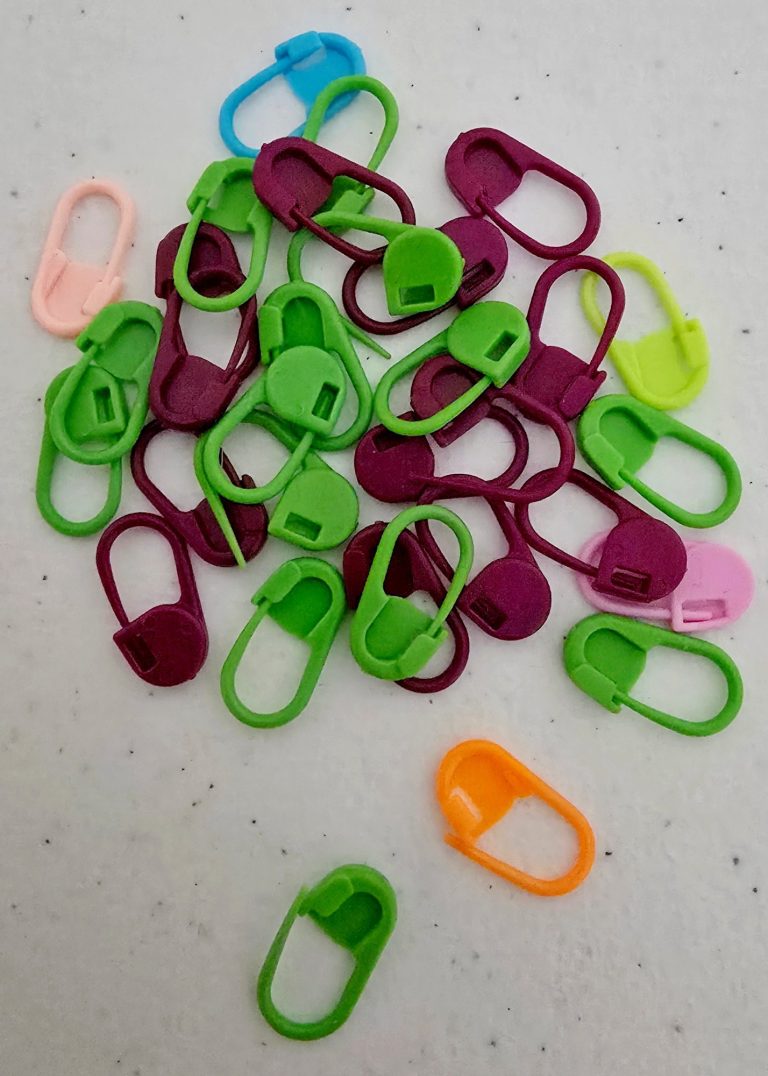
Stitch markers can be absolute lifesavers.
You place them on the knitting needle at a certain point. This saves you having to count and will prevent errors.
For example: if you are creating a cable on a certain place in the piece, you don’t want to count the stitches until you get there. Instead, you place a marker where the cable pattern starts and one where it ends. It’s a simple, colourful reminder to help make your knitting life easier.
Another example is when you’re knitting in the round. Trust me, two rows in you will not remember or be able to see where the row actually started. Put a stitch marker there and you will always know where you are.
Stitch markers come in many colours, which can be useful too. If you have a piece with multiple patterns (or pattern repeats), you may want to mark each pattern in a different colour. Or if you have a circular piece with a lace pattern, you can put one colour stitch marker at the beginning/end of your row and use another colour to mark where the lace pattern starts and ends.
I’d say these are a must to have once you get to circular and patterned work.
Stitch markers
Certain patterns require you ‘park’ several stitches and continue your knitting with the remaining stitches. For this you would use stitch holders.
Sometimes you have to hold a large number of stitches, in which case you’d place them on waste yarn. For smaller numbers, these stitch holders are perfect to keep the stitches you are not using safe.
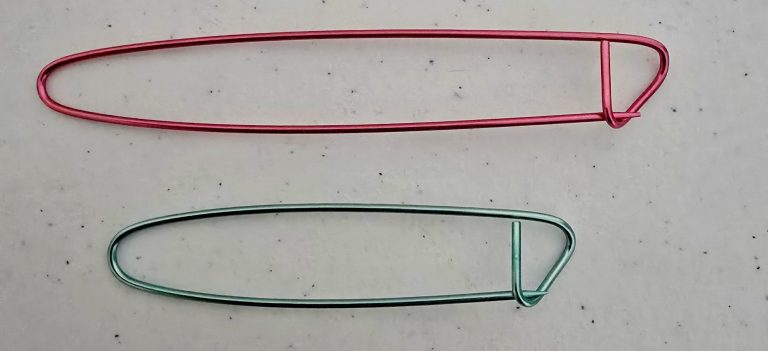
Stitch holders
Are needle cases a necessity? No, they are not.
However, once you buy more and more different types and sizes of knitting needles, it will help you be more organised. I have three.
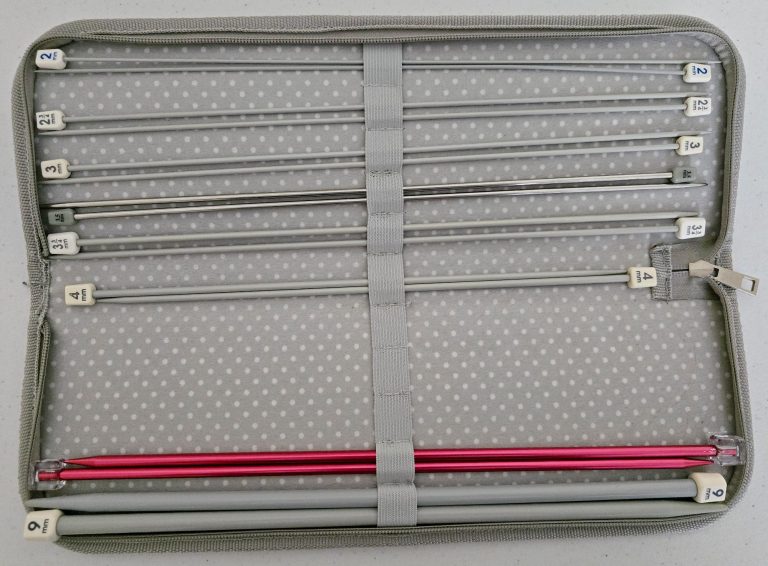
I’ve got one for single pointed needles, pictured here.
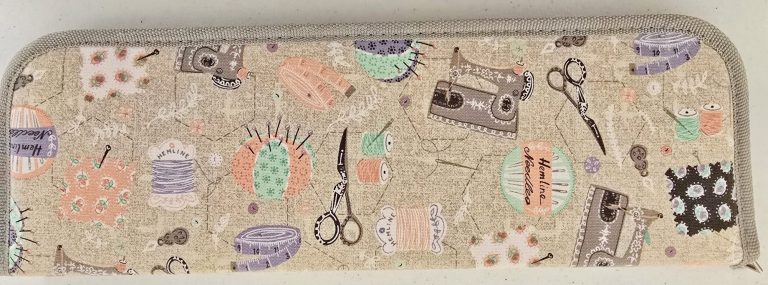
As you can see, I have organised them by size. The empty spots are for sizes I don’t have or for the needles currently in use. (disclaimer: it is quite normal to have several projects on the go)
This my case for circular needles.
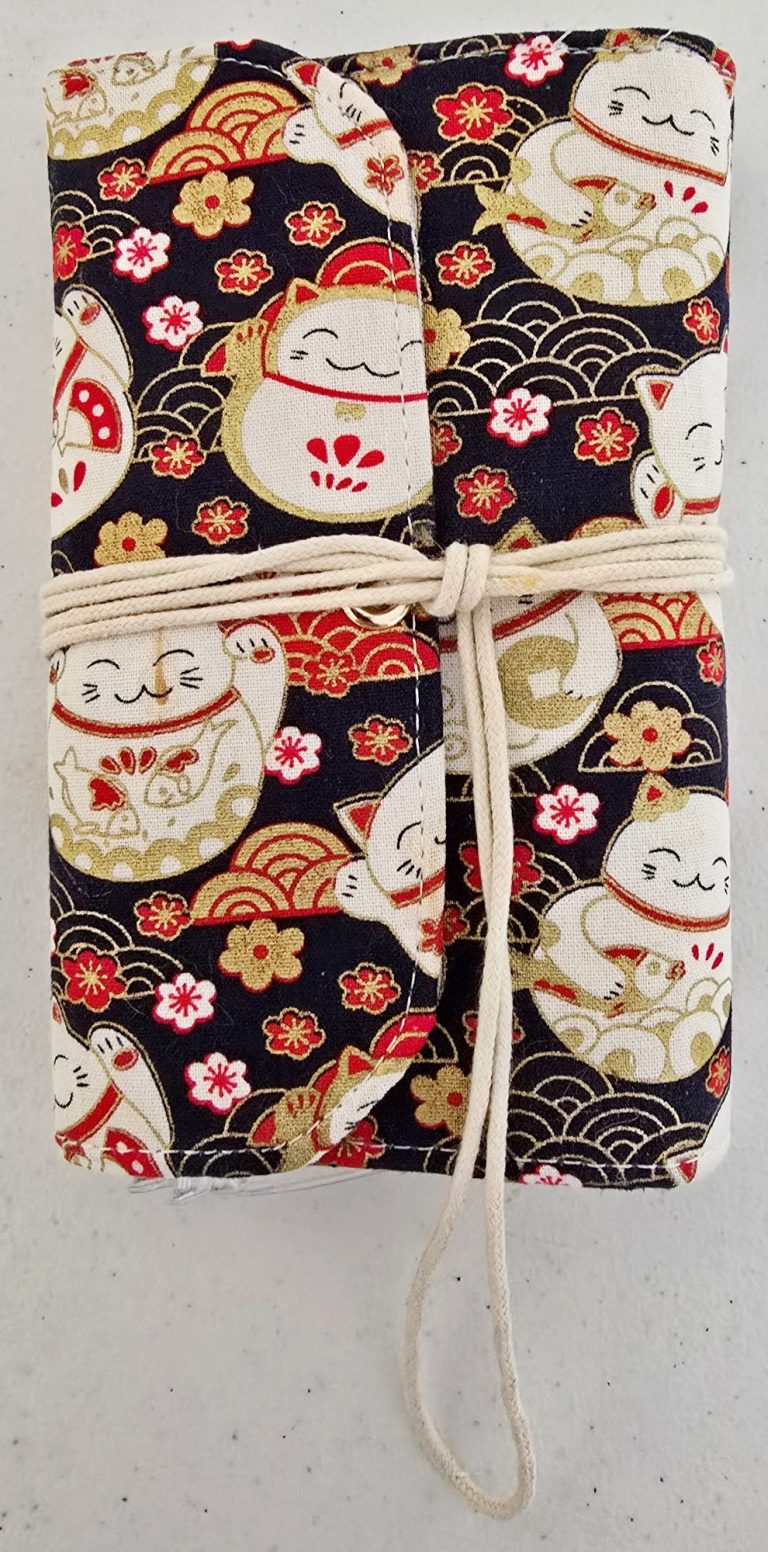
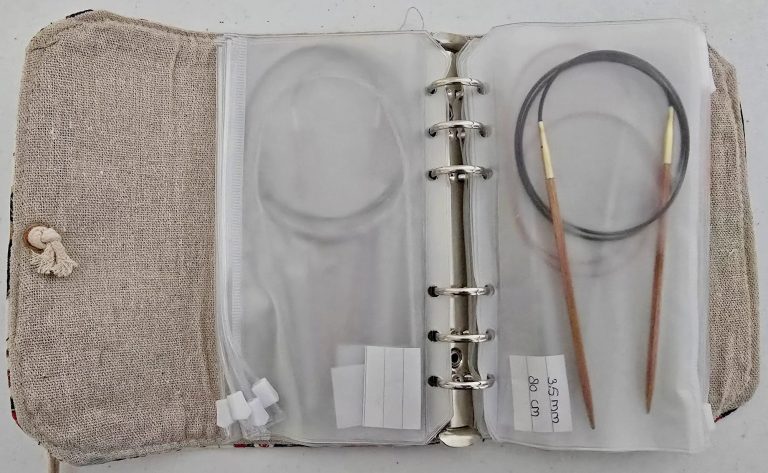
Circular needles usually don’t have the size on them, so I added small slips of paper with the needles size and length to help me find the right one.
And this is the one I use for my double pointed needles.
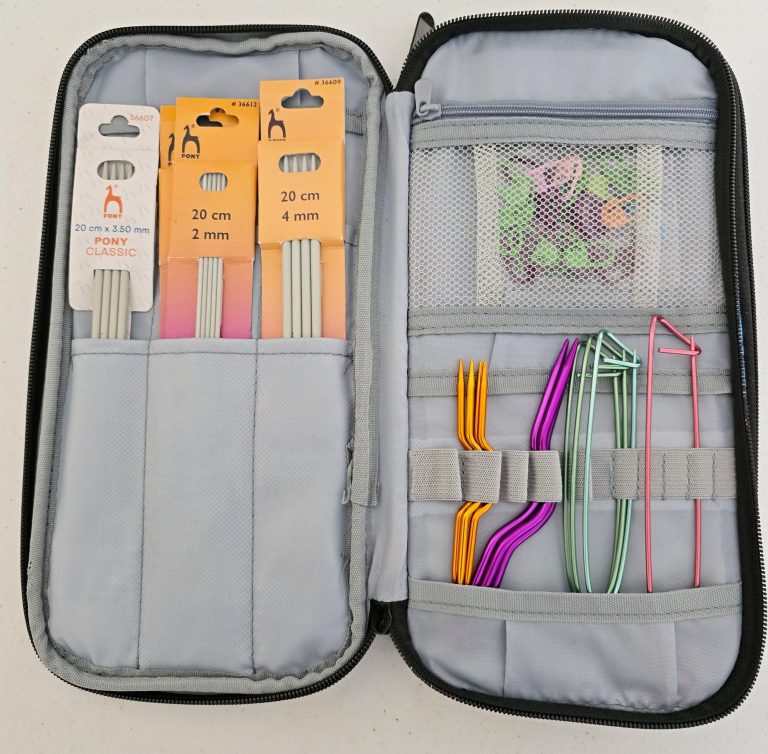
Double pointed needles also usually don’t have their size on them, so I tend to keep them in their original packaging, which – luckily – fits in this particular case.
I also keep my stitch holders and cable needles in this case.
Needle cases
This is another tool you can use, but it’s not strictly necessary.
However, you will find that while knitting your yarn may run off. Especially if it’s wound tightly into a round ball (like my example below, where I am reusing yarn).
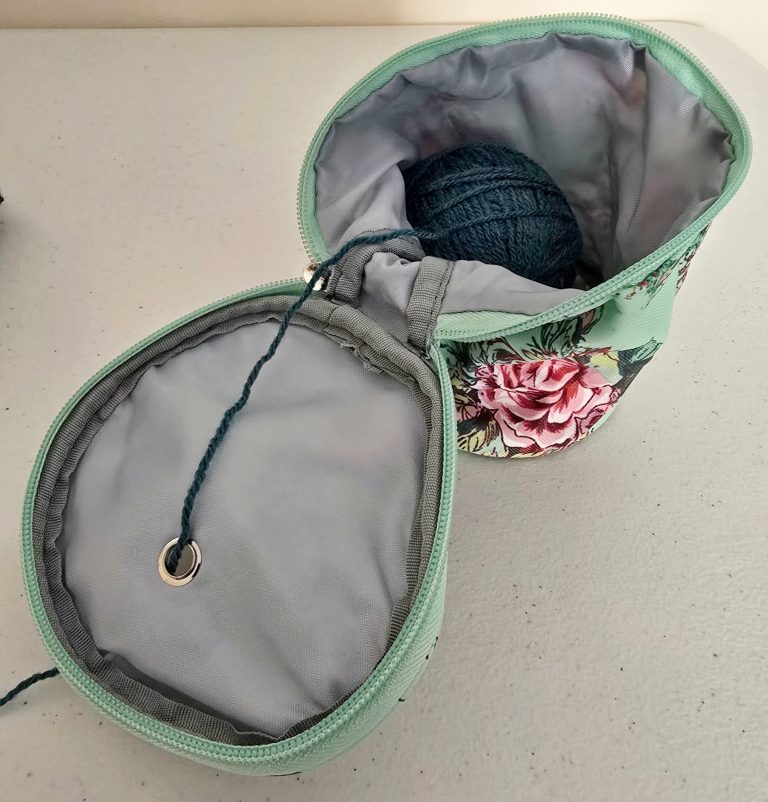
There are many types of yarn holders. As with pretty much everything else, if you want a yarn holder, find one that you like and that works for you. There is no right or wrong here.
One tip I will give: the one I have is quite light, which means it still sometimes moves about if I am a bit too vigorous when pulling on the yarn. A heavier option may be better.
Yarn holders
You’ve done it! You are now ready to actually start knitting.
The first thing you need to know is how to cast on. Shall we?